
Follow our easy and proven steps on how to install garage door weather stripping. Benefit from our experience for a perfect, long-lasting result.
Anyone who’s lived through a summer knows that stepping from the scorching heat into a cool garage feels like a sweet relief—until you realize your garage is almost as hot as the outdoors! Understanding how to install garage door weather stripping is a game-changer for homeowners battling the unforgiving desert elements. When that summer thermometer creeps past 110°F, your garage door’s seal becomes your home’s first line of defense.

JT’s Overhead Doors has seen firsthand how proper weather stripping transforms garages from sweltering storage spaces to comfortable home extensions.
Things to Know Learning How To Install Garage Door Weather Stripping
Before you learn how to install garage door weather stripping, it helps to know what you’re working with. There are several types of weather-stripping seals, and understanding which one to use can make a difference.
Bottom Seals
The bottom seal is your first defense against occasional flash floods and constant dust devils. When closed, the rubber strip at the door’s bottom edge presses against your garage floor. Common types include T-style seals that slide into a track, U-style seals that wrap around the bottom edge, Bulb-Type seals that compress for an airtight seal, and J-style seals with a hook shape that grabs the floor.
Side and Top Seals
Ever notice those thin strips of light around your garage door? Those aren’t just annoying light leaks—they’re escape routes for your precious air conditioning! Side and top seals close these gaps, giving your garage door a snug frame that hugs it when closed.
Some homeowners prefer vinyl or rubber strips for flexibility and weather resistance. Others swear by brush seals that block Arizona’s fine dust. For those willing to invest a bit more, aluminum/vinyl combinations stand up best to our brutal summer sun.
Threshold Seals
Think of these as speed bumps for water and dust. Installed right on your garage floor, threshold seals provide an extra line of defense when those surprise summer monsoons turn your driveway into a temporary stream.
Essential Tools and Materials for Weather Stripping Installation
Gathering the right tools first will save you time and frustration when learning how to install garage door weather stripping. You don’t need a professional workshop, but a few essential tools will make the job much easier. Hunt down your measuring tape, a sharp utility knife or heavy-duty scissors, and your trusty drill. Add a screwdriver set, hammer, and something to mark with. Don’t forget safety glasses and gloves—garages can be dusty. As for what you’ll be installing, you’ll need your chosen weather stripping materials, some fasteners, perhaps some adhesive caulk for tricky spots, and silicone lubricant.
The JT’s Overhead Doors team recommends investing in high-quality, UV-resistant materials that won’t crack after one summer season. The few extra dollars spent now could save hundreds in early replacement costs.
Step-by-Step Guide: How to Install Garage Door Weather Stripping
Preparation Steps

Start by raising your garage door entirely and securing it. Next comes cleaning—those tracks and edges must be spotless with no dust, cobwebs, or remnants of old weather stripping. A clean surface ensures better adhesion and a tighter seal.
Grab your measuring tape and get accurate dimensions of your door and opening. The good news? In a bone-dry climate, you won’t need to wait long for everything to dry after cleaning.
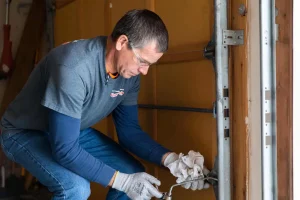
Installing the Bottom Seal
For homeowners, the bottom seal might be the most crucial part of installing garage door weather stripping. It’s the first line of defense against dust and surprise summer downpours.
If you’re replacing an old seal, remove what’s left. Once removed, give that retainer track a good cleaning. Measure your door width carefully, then add about half an inch extra before cutting your new seal. Most bottom seals have a T or U-shaped edge that slides into the track. A little dish soap can help it slide in more easily. Start at one end and work your way across.
Check that the seal hangs evenly across the entire width and test your door operation, making sure the seal compresses nicely against the floor without creating too much resistance.
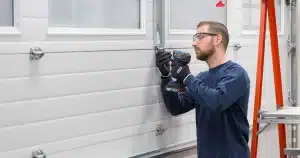
Installing Side and Top Weather Stripping
With summer electric bills rivaling small car payments, knowing how to install garage door weather stripping correctly for the sides and top is where you’ll notice the difference in your home’s energy efficiency.
Measure the height of both sides and the width across the top of your door frame. Add about an inch extra for the side pieces. The slight overlap at the bottom ensures no gaps between the side and bottom seals.

Position your side strips against the door frame, checking that they’ll press gently against the door when closed. For nail-on types, place your fasteners about every 8-12 inches. For adhesive types, The heat helps the adhesive bond quickly but works in small sections to ensure proper placement.
Install the top piece similarly to the sides, ensuring it slightly overlaps the side pieces. When you’re done, close the door slowly, watching how the weather stripping contacts the door. It should flex slightly but not fold or bunch up.
Testing and Adjustments
Close your garage door thoroughly and turn off any lights. Step inside and look around the perimeter for slivers of daylight. Those light leaks are your adjustment roadmap.
Don’t be discouraged if you need to make tweaks. Loosen fasteners where needed and reposition your weather stripping for better contact. Sometimes, just a quarter-inch adjustment makes all the difference.
Finally, operate your door several times, observing how the weather stripping behaves during opening and closing. It should flex appropriately without getting caught or folded.
Maintenance Tips for Long-Lasting Weather Stripping
Proper maintenance becomes essential once you’ve mastered installing garage door weather stripping. The climate is brutal on rubber and plastic. With some simple maintenance, you can dramatically extend your weather stripping’s lifespan.
Regular Inspection

Make “garage door check” part of your quarterly home maintenance routine. Look for cracking, brittleness, or sections pulled away from the door. Catching problems early means simple repairs rather than complete replacement.
Cleaning
Dust acts like sandpaper with every door movement. Twice yearly, clean those seals with mild soap and water. Your weather stripping will thank you by remaining flexible for months longer than neglected seals.
Lubrication
Think of silicone lubricant as sunscreen for your weather stripping. Apply a light coat every few months to keep the rubber and vinyl components from drying out in our desert air. JT’s Overhead Doors technicians often joke that garage door components age in “dog years” without proper lubrication.
Frequently Asked Questions About Garage Door Weather Stripping
How do you fasten a garage door weather stripping?
Garage door weather stripping around the sides and top is typically fastened using nails or screws, ensuring a tight seal against the door. The specific method can depend on the type of weather stripping and the material of the door frame.
How do you install a bottom seal strip on a garage door?
To install a bottom seal strip, first ensure the door is closed and then slide the new seal into the existing retainer track on the bottom of the door. Some bottom seals may require screws or adhesive for a secure fit.
What is the most durable weatherstripping?
EPDM rubber and silicone weatherstripping are often considered the best options for durability. These materials can withstand extreme temperatures and resist cracking and tearing over time, and they tend to last longer than felt or foam options.
What material is best for door weather stripping?
The best material for door weather stripping depends on the specific location and needs, but EPDM rubber and silicone are generally excellent choices due to their resilience and longevity. Vinyl is another standard and relatively durable option.
What are the three types of door weather stripping?
The three common types of door weather stripping include compression seals, which are squeezed between the door and frame; V-strip or tension seals, which create a tight seal when the door is closed; and brush seals, which use bristles to fill gaps.
Conclusion
Installing garage door weather stripping is one of those rare projects with instant gratification—close that newly sealed door, and you’ll immediately feel the difference. Lower energy bills are just the beginning—you’re also protecting valuable belongings from dust damage, reducing pest infiltration, and reducing noise.
For those who value their weekend time, JT’s Overhead Doors is the go-to solution for professional weather stripping installation. Their familiarity with local environmental challenges means they can recommend and install precisely the right materials for your specific situation.
End Note
At JT’s Overhead Doors, we take pride in being more than just a garage door company—we’re your neighbors who understand the unique challenges homeowners face. Our team brings technical expertise and local knowledge to every project we undertake. Whether you’re struggling with weather stripping that can’t stand up to our brutal summers or need help installing garage door weather stripping, we’re here to help with honest recommendations and quality craftsmanship.
Visit our website for examples of our work, or quickly schedule a consultation. Our friendly team is just a call away, ready to provide straightforward answers without the sales pressure. Connect with us today and discover why many families consider JT’s Overhead Doors their trusted partner for all garage door needs.