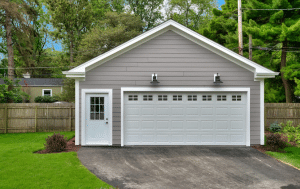

Worn-out garage door cables can affect the entire system and lead to serious performance or safety problems if not addressed promptly. These essential parts work with the springs to safely lift and lower the door. Knowing how to change a garage door cable can help avoid injuries, mechanical failure, and unexpected repair bills.
Most homeowners do not notice cable problems until the door becomes noisy, uneven, or stuck. Frayed or broken cables are common issues caused by daily use and changing weather. Understanding how they work and when to replace them can prevent serious inconvenience and costly damage.

This clear and complete guide will walk you through the exact steps to replace garage door cables like a pro. Whether you are a beginner or someone who enjoys DIY projects, this article will give you the tools, tips, and confidence to do the job right.
Signs That Indicate a Need for Cable Replacement
Frayed garage door cables are a clear warning sign that something is wrong. If you notice strands sticking out or cables starting to split, they are wearing out. Worn cables can snap suddenly and should be replaced immediately to avoid accidents or property damage.
An uneven garage door is another strong signal that something’s off. If one side rises higher or the door looks crooked when moving, the cable on one side may be stretched or broken. Ignoring this issue can cause pressure springs, tracks, or the opener.
Strange garage door noises, such as squeaking, grinding, or snapping sounds, often point to cable problems. Worn or loose cables may be rubbing against hardware or slipping off the drum. These sounds mean the cables are stressed and should be checked and replaced before they break entirely.
Tools and Materials Needed for Changing Garage Door Cables
Before changing garage door cables, gathering the necessary tools and materials is essential for a smooth and efficient process. Below is a complete list of the tools and materials you’ll need:
- Winding Bars: Used for safely winding and unwinding the torsion springs.
- Adjustable Wrench: Essential for loosening nuts and bolts.
- Pliers: Helpful for gripping and manipulating cables.
- Flathead Screwdriver: Useful for prying and adjusting components.
- Replacement Cables: Ensure they are the correct length and type for your garage door.
- Gloves and Safety Glasses: Help shield your hands and eyes from sharp edges or unexpected movement during the repair.
Having these tools and materials ready will make the cable replacement process more manageable and help ensure your safety while working. Using well-maintained tools for garage door cable replacement is essential to ensure the job is done safely and correctly.
It also helps to ask a friend or family member to lend a hand during the process for added safety and support. Having an extra set of hands can be incredibly beneficial, especially when dealing with heavy or awkward garage door system components.
Safety Precautions When Working with Garage Doors
Before replacing garage door cables, it’s important to understand the risks involved. Garage doors are heavy, tightly wound, and dangerous if mishandled. Follow these safety tips to avoid accidents and stay in control.
Disconnect the power
Always unplug the garage door opener or shut off power at the breaker box. This keeps the system from activating while you’re working near moving parts or cables.
Secure the door
Use locking pliers or C-clamps to hold the door in place on the tracks. This will prevent it from falling or shifting while you fix the cables.
Wear protective gear
Before starting, put on safety glasses and thick gloves. This will protect your hands from sharp parts and keep your eyes safe from flying debris or loose spring pieces.
Work in a bright space
Good lighting makes a big difference when handling tools and small hardware. When the area is well lit, you’ll see problems faster and avoid mistakes.
Ask for help
Never try to change garage door cables alone. A second person can stabilize the door and get help quickly if anything goes wrong during the repair.
Replacing a garage door cable is a serious task that requires care and attention. Following basic safety steps protects you and your home while keeping the garage door system working properly.
Step-by-Step Guide to Changing Garage Door Cables
Changing garage door cables can seem daunting, but by following these steps, you can master the task safely and complete it like a pro.
Step 1: Prepare the Work Area

Clear the garage space so you can move safely. Disconnect the garage door opener and use locking pliers on the track to securely hold the door.
Step 2: Release Tension from the Springs
Slowly unwind the torsion springs using winding bars. This step reduces tension on the cables and must be done carefully to avoid injury or sudden garage door movement.
Step 3: Remove the Old Cables
Loosen the cable drum bolts with an adjustable wrench. Gently remove the worn cables, and pay attention to how they were installed so you can match the new ones.
Step 4: Install the New Cables
Hook the new cables into place and wrap them around the drum evenly. Ensure everything stays tight, aligned, and appropriately seated in both sides’ cable grooves.
Step 5: Reapply Tension to the Springs
Rewind the torsion springs using winding bars until the correct tension is achieved. Check that the cables are secure and that the garage door opens and closes smoothly.
By following these steps and taking your time, you can successfully change your garage door cables and restore your door’s functionality.
Common Mistakes to Avoid When Changing Garage Door Cables
Even experienced DIY enthusiasts can make mistakes when changing garage door cables. Being aware of these common problems can help you avoid them:
- Incorrectly Winding the Springs: Failing to wind the torsion springs correctly can result in uneven tension and poor door operation. Always use winding bars and ensure the springs are wound in the right direction.
- Using the Wrong Cable Size: Using cables that are too short or too long can cause operational issues. Always verify the specifications of your garage door system before purchasing replacement cables.
- Neglecting Safety Measures: Skipping safety precautions, such as disconnecting the power or securing the door, can lead to accidents. Always prioritize safety, even if you’re familiar with the process.
Avoiding these mistakes will make the cable replacement process smoother and help ensure the longevity and safe operation of your garage door system.
Maintenance Tips to Keep Your Garage Door Cables in Good Shape for Years
Regular maintenance is key to extending the life of your garage door cables and ensuring they function properly. Try these simple maintenance steps to help your garage door cables stay in great working condition:
1. Inspect Regularly
Check your garage door cables for rust, wear, or fraying every few months to catch problems early and avoid unexpected breakdowns or safety issues.
2. Lubricate Moving Parts
Use a silicone-based lubricant on the garage door cables, rollers, and tracks to minimize friction, reduce noise, and extend the system’s lifespan.
3. Balance the Door

Check that the garage door stays level when halfway open. An unbalanced door strains the cables and can cause them to wear out faster.
By incorporating these maintenance practices into your routine, you can prevent potential issues and prolong the lifespan of your garage door cables.
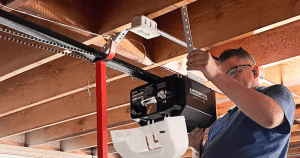
When to Call a Professional for Garage Door Repairs
While changing garage door cables can be a manageable DIY task, sometimes calling in a professional is best. Recognizing the right time to call a professional can help you avoid costly mistakes, save time, and prevent serious safety risks.
If you encounter issues such as a broken spring, damaged tracks, or if the door remains unresponsive after replacing the cables, it’s time to consult a professional. These issues often require specialized tools and expertise to resolve safely.
Additionally, if you feel uncomfortable or unsure at any point during the cable replacement process, don’t hesitate to contact a garage door repair technician. They can provide guidance, ensure the job is done correctly, and guarantee the safety and functionality of your garage door system.
Frequently Asked Questions
Do both garage door cables have to be the same length?
Yes, both garage door cables must be the same length to balance the door. Cables that aren’t even can make the garage door open unevenly or get stuck while moving.
What’s the proper way to detach a garage door cable from the bottom bracket?
Start by disconnecting the garage door opener and securing the door. Next, grab a wrench or pliers and gently remove the cable from the hook on the bottom bracket.
Why does my garage door cable keep coming off the pulley?
Garage door cables can come off the pulley when tension is too low, the drum is worn out, or the system becomes misaligned. Check for frayed cables, unbalanced springs, or bent tracks that may be causing the issue.
Do I need to release the spring tension before replacing garage door cables?
Yes, you must release the spring tension before changing garage door cables to avoid serious injury. The springs hold high pressure and can snap if not handled correctly.
Conclusion
Learning how to change a garage door cable the right way can save you time, money, and frustration. You can fix cable issues and restore smooth door movement with the right tools and safe steps. This guide was made to give you precise, simple instructions you can trust.
Routine upkeep can prevent more serious issues from developing later on. If your cables look frayed, your door feels uneven, or you’re unsure about handling spring tension, it’s okay to call for help. JT’s Overhead Doors proudly offers expert garage door repair in Mesa, AZ, for fast, safe service.
We hope this guide gave you the confidence to take on your repair. If it helped you, share it with someone facing the same garage door issue. Your experience could make someone else’s project easier and safer from start to finish.
End Note
Discover how JT’s Overhead Doors makes garage door care easier, safer, and more reliable for homeowners like you. Whether you’re planning a new install or need a quick fix, we’re here to help. Get to know us on our About Us page and see real project results in our Gallery.
If you’re dealing with worn-out cables, loud rollers, or a stuck opener, we offer full garage door services. Explore expert garage door repair, seasonal garage door maintenance, and fast emergency service when you need help most. We also install quality garage doors and openers designed for long-term performance.
We serve a wide area—check our full coverage on the Service Areas page. Visit our blog for helpful tips, view current coupons, or Contact Us to schedule a visit. Don’t forget to follow along on Instagram and Facebook for updates, repairs, and inspiration.
JT’s Overhead Doors
2449 E Lindrick Dr, Gilbert, AZ 85298, United States
+14806623315