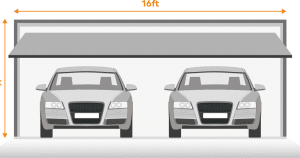

When attaching a garage door opener to the door, you need the right tools, careful preparation, and a proper installation process to ensure everything works safely and smoothly. A correctly installed opener enhances security, convenience, and the long-term performance of your entire garage door system, saving you time and avoiding costly repairs in the future.
This step-by-step guide explains how to install the opener securely, highlights essential safety precautions, and shares expert tips for smooth operation. Whether you’re replacing an old opener or setting up a brand-new one, you will gain the confidence to complete the job correctly and improve your garage door’s functionality with ease.
Tools and Materials Needed for Attaching Garage Door Opener to Door
Before attaching a garage door opener to the door, gather all the needed tools. Being prepared makes the process faster, safer, and easier. Here’s what you need for a secure installation:
- Power Drill – Helps you create clean, precise holes for the opener mounting brackets and hardware.
- Adjustable Wrenches – Needed to tighten nuts, bolts, and other small parts securely.
- Screwdrivers (flathead and Phillips) – For fastening screws and making quick adjustments during the setup.
- Mounting Brackets – These hold the opener firmly in place for safe and stable operation.
- Opener Arm Hardware – Connects the opener motor to the garage door so it opens and closes smoothly.
- Fasteners and Bolts – These are essential for securing all the parts together and preventing loose connections.
- Safety Glasses – Protect your eyes from dust, debris, and metal shavings while working.
- Sturdy Ladder – Allows you to reach the top of the garage door and ceiling mounting points without wobbling.
- Opener Manual – Keeps you on track with the correct measurements, alignment, and recommended installation points.
Having tools ready saves time and avoids mistakes that affect performance. Once organized, start measuring, marking, and installing for smooth, safe operation.
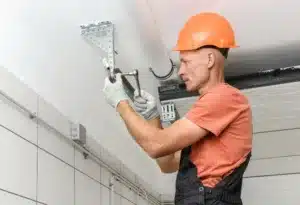
Safety Precautions to Consider for Attaching a Garage Door Opener to the Door
Attaching a garage door opener seems simple, but it involves heavy parts and electrical risks. Basic safety steps protect you and your garage door system.
1. Disconnect the Power Supply Completely
Always cut the power before working on the opener. This prevents electrical shocks and stops the garage door from moving unexpectedly during installation or adjustments.
2. Never Attach the Opener While the Door is Moving
Ensure the door is closed and stable before starting. Working on a moving or unbalanced garage door can cause sudden drops, accidents, or damage.
3. Wear Proper Protective Gear
Use gloves to prevent cuts and goggles to protect your eyes from debris. Safety gear avoids small injuries that can turn into serious problems.
4. Inspect the Garage Door Springs
Check if springs are worn or unbalanced, as they strain the opener and cause malfunctions. Replace or have damaged springs inspected professionally before installation.
5. Keep the Area Clean and Clear
Remove tools, ladders, and clutter from the workspace. A clean area lets you move safely while attaching the garage door opener without accidents or tripping.
Following these steps keeps you safe and makes installation smoother. Proper checks prevent damage, save money, and keep your garage door working reliably for years.
Preparing the Garage Door and Opener
Preparing your garage door and opener before installation saves time and avoids mistakes. Proper preparation makes the process safer and keeps the system reliable.
1. Check the Garage Door Balance
Make sure the door moves smoothly without sticking or jerking. If it feels heavy or uneven, adjust the springs or call a professional for safe garage door repairs.
2. Inspect and Align The Brackets
Look at the mounting brackets to ensure they are secure and properly aligned. Misaligned brackets can strain the garage door opener and lead to poor performance over time.
3. Clean the Mounting Area
Wipe away dirt and debris around the mounting points. A clean surface helps the opener brackets attach firmly, improving stability and preventing unnecessary vibrations during operation.
4. Lay Out All Opener Parts
Organize the opener parts, hardware, and mounting brackets on a flat surface. This makes it easier to find what you need while attaching the opener arm to the door.
Preparing your garage door properly ensures secure installation and extends the opener’s life. A little extra time now prevents problems and keeps it running smoothly.
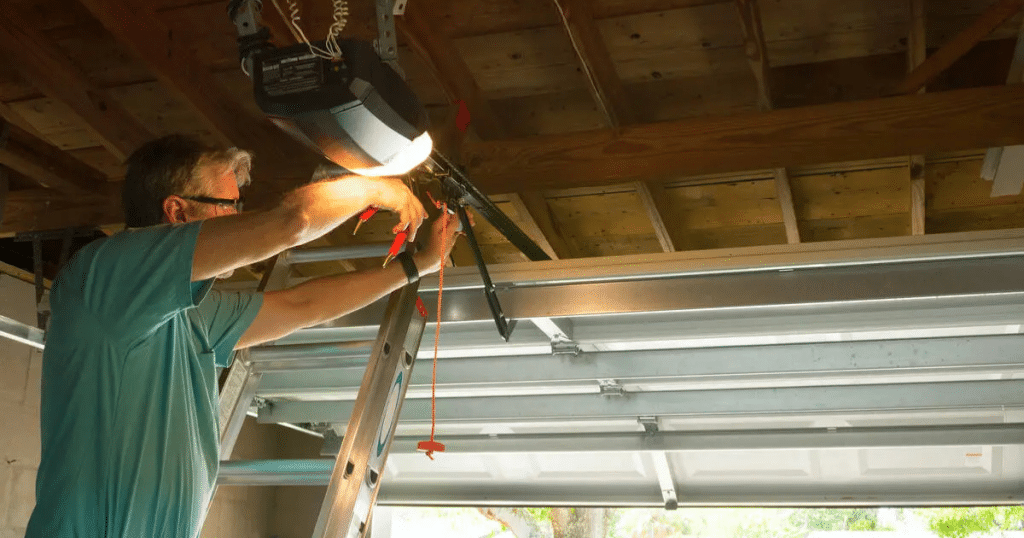
Step-by-Step Guide to Attaching the Garage Door Opener to the Door
Installing a garage door opener on the door needs precise setup to ensure smooth and long-lasting performance. Proper care helps avoid damage, misalignment, and expensive garage door repairs.
Step 1. Install the Mounting Bracket on the Top Section of the Door
Position the mounting bracket in the middle of the top section of the door. Secure it tightly with bolts to keep it stable and firm during regular garage door movement.
Step 2. Attach the Opener Arm to the Bracket
Connect the opener arm to the mounted bracket. Some models need the straight and curved arms joined first to ensure smooth and proper door movement when operating.
Step 3. Secure the Arm With Bolts and Lock Washers
Use bolts and lock washers to hold the opener arm firmly. Keep it tight but allow slight movement for smooth door operation without unnecessary strain.
Step 4. Align the Opener Rail for a Level Connection
Make sure the opener rail stays even and properly aligned from the motor unit all the way to the door. Proper alignment reduces strain, improves performance, and extends the life of your opener.
Step 5. Connect the Opener Arm to the Trolley Mechanism
Attach the opener arm securely to the trolley. Lock all pins in place to keep the connection stable, preventing shifting or loosening during repeated use.
Take your time with each step to prevent misalignment, which can lead to strain or premature failure. A careful installation keeps your garage door opener reliable and long-lasting.
Testing the Garage Door Opener After Attaching to the Door
After attaching the garage door opener to the door, test it for smooth, safe operation. Proper testing prevents issues and keeps it working longer. Here’s how:
1. Reconnect the Power Supply
Plug the garage door opener back in or restore power. Check all connections to prevent sudden movement or electrical issues during testing.
2. Run a Full Open-and-Close Cycle
Use the wall button or remote to fully open and close the door. Smooth, steady movement shows the opener is properly aligned and working correctly.
3. Listen for Unusual Sounds
Watch and listen carefully for grinding, jerking, or loud noises. Strange sounds may signal misaligned parts or the need for adjustments to ensure smooth operation.
4. Test the Safety Reversal Feature
Place a small object under the door, like a block of wood. The door should reverse immediately on contact to ensure proper safety function.
5. Adjust Travel and Force Settings if Needed
If the door does not reverse or close properly, adjust travel and force settings. Proper tuning improves performance and reduces unnecessary strain on the opener.
Testing your garage door opener after installation ensures it’s working safely and efficiently. A quick check now saves you from future repairs and keeps your door reliable for years.
Troubleshooting Common Issues for Attaching Garage Door Opener to Door
Sometimes small issues come up after attaching a garage door opener to the door, but quick checks can fix them. Troubleshooting saves time, stress, and prevents bigger problems. Here’s how:
- The opener arm comes loose: If the opener arm feels loose, inspect and tighten all bolts securely. Loose bolts lead to unsteady movement and can negatively impact overall performance.
- The door doesn’t move evenly: Uneven movement means unbalanced springs. Inspect, adjust, or replace them as needed to restore smooth, level garage door operation.
- Strange noises during operation: Grinding or squeaking means moving parts need lubrication. Apply garage door lubricant to hinges, rollers, and opener arm for smoother, quieter operation.
- Opener won’t engage: If the opener doesn’t work, check the trolley mechanism connection to the opener arm. Ensure the emergency release cord wasn’t accidentally pulled.
Troubleshooting simple issues keeps your garage door opener working smoothly and safely. Quick fixes like tightening, balancing, or lubricating parts help avoid costly repairs.
Expert Tips and Best Practices for Attaching a Garage Door Opener to the Door
A few expert tips make attaching a garage door opener easier and help it last longer. Best practices prevent damage, improve performance, and keep your garage door safe. Here’s how:
1. Double-Check Alignment Before Final Tightening
Ensure the opener arm, rail, and brackets are properly aligned before tightening. Proper alignment minimizes strain and allows the door to operate smoothly without any problems.
2. Avoid Over-Tightening the Opener Arm
Do not overtighten the opener arm bolts. Excess pressure adds unnecessary stress on door sections, reducing durability and causing long-term performance problems.
3. Use High-Quality Fasteners
Choose strong, durable fasteners that can handle the door’s weight. Poor-quality hardware may loosen over time, creating safety risks and reducing reliable operation.
4. Periodically Check Bolts and Hardware
Check bolts and brackets frequently, particularly during the first few weeks after installation. Tighten any loose parts to keep the garage door opener secure and working properly.
Following these best practices makes installation easier and ensures your garage door opener runs smoothly for years. Small steps now prevent costly repairs and keep your system safe.
Maintenance Tips for Your Garage Door Opener
Regular maintenance keeps your garage door opener smooth, safe, and prevents costly repairs. Simple checks save time, money, and hassle. Here are the best tips to keep it in top shape:
- Lubricate Moving Parts Regularly: Apply garage door lubricant to the opener arm, brackets, rollers, and hinges every few months to reduce friction, prevent wear, and ensure smooth operation.
- Inspect Mounting Hardware Often: Check bolts, brackets, and mounting hardware regularly to ensure nothing is loose. Tighten shifting parts to keep the opener stable, secure, and working smoothly.
- Clean the Safety Sensors: Wipe the garage door safety sensors gently with a soft cloth to remove dirt and dust. Clean sensors keep the auto-reverse feature working properly.
- Address Unusual Noises or Slow Movement Quickly: If the door struggles to open or makes loud grinding noises, troubleshoot immediately. Quick fixes prevent damage and extend the opener’s lifespan.
Regular care keeps your garage door opener reliable and safe for daily use. Small maintenance steps now prevent bigger problems and costly repairs later.
FAQs
Can I use a universal bracket kit, or do I need a brand-specific bracket?
Many universal bracket kits work with different openers, but using a brand-specific bracket ensures a better fit. It also provides stronger security and longer-lasting performance.
How do I attach a wall-mounted (jackshaft) opener to the door?
A wall-mounted jackshaft opener connects directly to the torsion bar instead of the door. Always follow your opener’s manual for proper installation and safe operation.
How do I re‑attach the opener arm after manual disengagement?
Pull the emergency release cord toward the opener to reset it. Then, manually align the trolley with the arm before securely reconnecting it.
How tight should the opener arm be on the door?
The opener arm should be secure but not overly tight. Allow slight movement so the door can flex naturally while opening and closing smoothly.
Conclusion
Attaching a garage door opener to the door might seem challenging, but with the proper steps, you can do it safely and effectively. Careful preparation, the right tools, and proper alignment ensure smooth operation while protecting your garage door system. A well-installed opener adds convenience, security, and long-lasting performance you can rely on every day.
Now that you know the best tips, maintenance practices, and troubleshooting steps, you can keep your garage door opener working like new. Regular care prevents costly repairs and extends the life of your opener. But if you ever notice unusual noises, poor alignment, or spring issues, it’s always smarter to get help from skilled professionals.
At JT’s Overhead Doors, we’re here to make your garage door safe, reliable, and hassle-free. Whether you need expert installation or fast garage door repair in Mesa, AZ, our team is ready to help. Call us today and enjoy a smooth, secure garage door system without the stress of doing it alone.
End Note
Looking for trusted garage door experts who care about your home’s safety and convenience? Visit JT’s Overhead Doors and explore our wide range of garage door services. From reliable garage door repair to expert garage door maintenance, we make sure your door works like new every time.
Need quality doors or openers? Explore our garage door service options, including premium doors from Safeway and durable openers like LiftMaster. View our service areas, read more on our blog, and see stunning results in our gallery.
Want savings and updates? Grab exclusive deals on our coupons page, follow us on Instagram and Facebook, and learn more About Us. Ready to schedule? Contact us today for fast, friendly service that keeps your garage door safe, stylish, and secure.
JT’s Overhead Doors
2449 E Lindrick Dr, Gilbert, AZ 85298, United States
+14806623315