

Learning how to change a garage door motor helps you save money while restoring smooth, reliable movement to your door. Replacing a worn or faulty motor improves safety, prevents strain on other parts, and keeps your garage system operating efficiently. This simple upgrade also avoids expensive professional repairs, giving you better control over your home’s maintenance.
Many homeowners think motor replacement is complicated, but with the right tools and clear steps, it’s surprisingly manageable. Following this guide ensures proper installation, smoother operation, and fewer costly repairs over time. Take a careful, step-by-step approach and you’ll gain confidence in maintaining your garage door while improving long-term performance and overall home safety.
Tools and Materials You Will Need
Before you start working on your garage door, gather everything you need to save time and prevent interruptions. Having the correct tools ensures a smoother process when changing the motor. Here’s what you will need:
- A compatible replacement motor for your garage door opener system.
- Wrench set and screwdrivers.
- Step ladder for reaching overhead components.
- Socket set for removing bolts.
- A voltage tester to confirm that the power is off.
- Safety gloves and goggles.
- The motor’s installation guide is for reference.
Having these tools ready prevents unnecessary trips and makes replacing your garage door motor more efficient.
Safety Precautions Before You Begin to Change the Garage Door Motor
Working on a garage door motor involves handling heavy parts and electrical wiring. Taking safety seriously helps you avoid accidents and protects your home’s garage door system.
1. Disconnect Power
Always unplug the opener from its outlet and double-check with a voltage tester to ensure no live current remains before starting any motor replacement work.
2. Secure the Door
Keep the garage door fully closed and locked before replacing the motor to prevent sudden movement that could cause damage or serious injury.
3. Use Protective Gear
Wearing durable gloves and safety goggles helps protect your hands and eyes from sharp edges, falling debris, and other potential hazards during the process.
4. Avoid Working Alone
Having a second person assist ensures safer handling of heavy parts, provides extra support, and reduces risks when making adjustments or lifting components.
5. Inspect Door Springs
Examine springs and cables carefully, as weak or damaged components can create dangerous tension and add extra strain when installing a new motor.
Following these precautions ensures your garage door motor replacement is safe from start to finish.
Steps Guide to Safely Remove Your Old Garage Door Motor
When learning how to change a garage door motor, start by carefully removing the old one. Take your time and follow these steps to avoid damage to other parts.
Step 1. Cut the Power Supply
Unplug the opener completely and double-check with a voltage tester to ensure no power is flowing. This keeps you safe from electrical shocks during removal work.
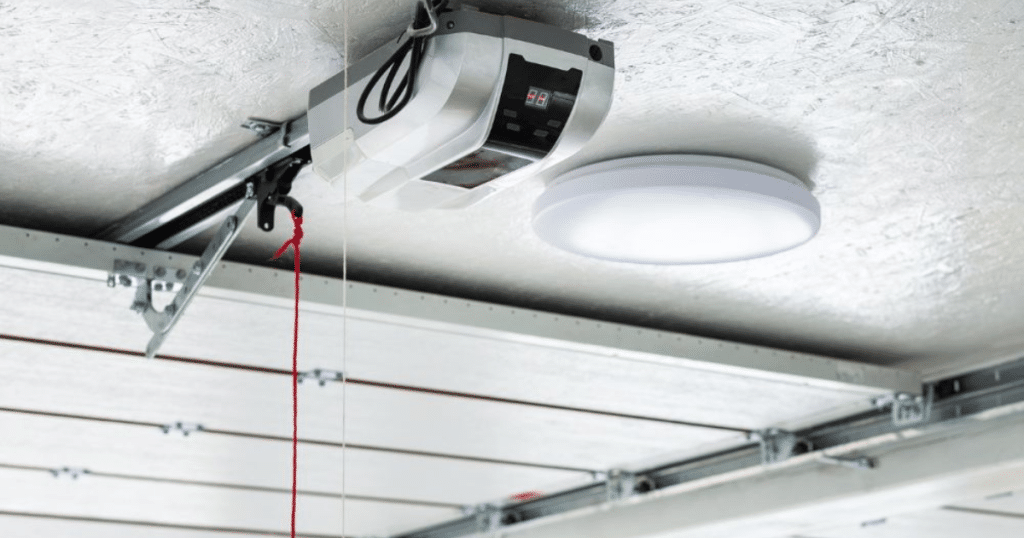
Step 2. Detach the Emergency Release Cord
Pull the red emergency release cord to disconnect the motor from the garage door track. This prevents accidental movement and ensures the door stays in place.
Step 3. Remove the Cover Panel
Use a screwdriver to remove the protective cover from the motor housing. Doing this gives you clear access to internal parts and wiring that need disconnecting.
Step 4. Disconnect Wiring Connections
Carefully label each wire before removing it from the terminals. This step saves time later and avoids confusion when installing the new garage door motor unit.
Step 5. Unscrew Mounting Bolts
Use a socket wrench to remove the bolts holding the motor to its bracket. Keep the bolts aside for reuse when installing the new motor.
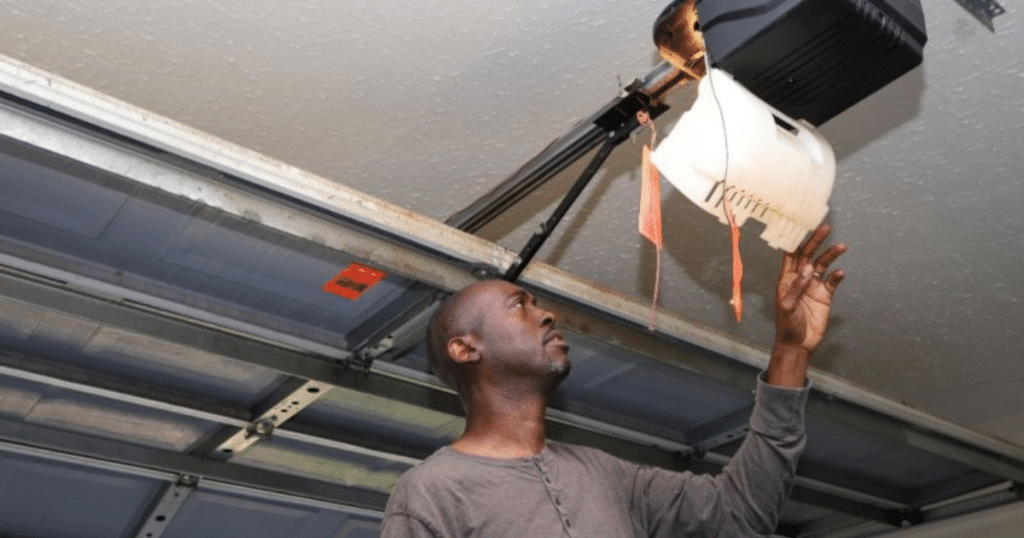
Step 6. Lower the Motor Carefully
Ask for help to slowly lower the motor from its mounting bracket. Supporting its weight prevents sudden drops that might damage the opener rail or chain.
By following these simple steps, you can safely remove the motor without damaging your garage door opener system. Take your time and handle each part with care.
Installing the New Garage Door Motor
Once the old unit is taken out, setting up the new motor becomes an essential next step. Proper garage door opener installation ensures smooth operation, reduces noise, and keeps the system reliable.
1. Position the Motor Unit
Carefully align the new motor with the existing mounting bracket. Correct positioning helps the opener rail, drive system, and other components work together seamlessly without added strain.
2. Secure with Bolts
Use a wrench to securely tighten the mounting bolts, keeping the motor stable and properly in place. A secure fit prevents shifting or vibrations that may affect garage door movement.
3. Attach the Drive System
Connect the chain, belt, or screw drive to the new motor carefully. Proper attachment ensures smooth lifting and lowering of the garage door during operation.
4. Reinstall the Motor Cover
Replace the protective motor cover to shield internal parts from dust, dirt, and debris. This step helps maintain the motor’s durability and long-term performance.
5. Reconnect the Emergency Release Cord
Reattach the emergency release cord and test it for smooth operation. A working release cord ensures you can safely disengage the motor when needed.
With these steps completed, your new garage door motor installation will be secure, efficient, and reliable. Double-check each connection to guarantee safe and trouble-free operation.
Wiring and Electrical Connections of Garage Door Motor
Connecting the wiring correctly is essential for your motor to function properly. Take your time to avoid mistakes that could lead to electrical issues.
1. Match the Labeled Wires
Reconnect the wires using the labels made during removal, ensuring each terminal matches correctly for safe, smooth garage door motor operation.
2. Secure with Wire Nuts
Tighten all electrical connections firmly with wire nuts to prevent loose signals or interruptions affecting garage door opener performance and reliability.
3. Plug into a Grounded Outlet
Plug the motor into a grounded outlet only, avoiding extension cords that may cause power fluctuations and potential electrical safety risks.
4. Check Safety Sensors
Verify the photo-eye safety sensors are aligned and securely connected, ensuring the garage door stops or reverses if anything blocks its path.
After wiring, carefully double-check all connections to ensure they are secure and correct before powering the system for safe and reliable operation.
Testing the New Garage Door Motor
Before regular use, test your new garage door opener to ensure it works smoothly. Quick checks prevent future issues and keep the system reliable.
1. Plug in the Opener
Restore power by plugging the opener into a grounded outlet, and listen carefully for unusual noises that may indicate loose parts or alignment problems.
2. Operate the Door Manually
Lift and lower the garage door manually to ensure it moves freely without added resistance, confirming proper balance and smooth motor operation.
3. Test the Remote Control
Press the remote control to confirm that the new motor responds instantly to commands. A slow response may mean wiring or signal issues.
4. Check the Safety Reverse Function
Put a solid object beneath the door while it’s closing to check if the safety reverse feature activates properly. It should stop and reverse immediately upon gentle contact.
5. Adjust Travel Limits
Use the adjustment screws to fine-tune how far the door opens and closes, ensuring proper alignment and preventing strain on the motor.
By performing these simple tests, your garage door motor installation will stay safe, quiet, and efficient for everyday use without unexpected problems later.
Troubleshooting Common Issues
Sometimes, even after a proper installation, minor issues can occur. Here’s how to handle them:
- Motor Hums But Doesn’t Move: If the motor hums but does not move, check if the drive system is correctly connected and properly aligned.
- The Door Only Opens Partially: When the garage door opens partially, adjust the travel limit settings to ensure smooth, complete movement without unnecessary strain.
- Remote Doesn’t Work: If the remote doesn’t work, reprogram it following the opener’s manual or replace the batteries for proper signal response.
- Safety Sensors Blink: Blinking safety sensors often means misalignment. Clean and realign the photo-eye sensors to remove false obstruction warnings effectively.
- Motor Runs Too Loudly: A noisy motor may need lubrication. Apply garage door lubricant on moving parts and tighten any loose bolts carefully.
Simple troubleshooting steps can prevent the need for unnecessary garage door repair calls.
Maintenance Tips for Your New Garage Door Motor
Keeping your garage door motor in good shape extends its life and prevents breakdowns. Simple garage door opener care keeps it smooth and avoids costly garage door repairs.
1. Lubricate Moving Parts Regularly
Apply high-quality garage door lubricant to chains, rails, and hinges regularly. Smooth-moving components reduce friction and prevent extra strain on the motor.
2. Tighten Bolts and Screws
Inspect and tighten all bolts and screws to prevent vibrations from loosening motor parts, keeping your garage door opener stable and long-lasting.
3. Check Door Balance
Raise the garage door manually to the halfway point, then let go carefully. A properly balanced door reduces stress and prevents unnecessary strain on the motor.
4. Inspect Safety Sensors
Wipe safety sensors clean and check alignment. Properly working sensors help the garage door detect obstacles and maintain a safe operating system.
5. Test the Auto-Reverse Function Monthly
Place an object under the door while closing. The auto-reverse should trigger immediately, ensuring safe and reliable garage door opener performance.
With these easy motor maintenance tips, your garage door opener will stay efficient, safe, and dependable, giving you years of trouble-free operation.
FAQs
How to Test the Safety Reverse Function After Motor Swap?
Place a solid object under the garage door and close it. If the door reverses automatically upon contact, the safety reverse system is working correctly.
Which Type of Motor Is the Quietest?
Garage door motors with a belt drive operate more quietly than traditional chain-drive systems. They are ideal for garages near bedrooms or living spaces where noise is a concern.
What Horsepower Opener Do I Need for a Heavy or Insulated Door?
For heavy wooden or insulated garage doors, a 3/4 to 1 horsepower motor provides smooth lifting and reliable long-term performance.
Do I Need to Reprogram My Remote When Changing the Motor?
Yes, most new garage door motors require reprogramming of remote controls and keypads. This ensures proper syncing and smooth operation with the updated opener system.
Conclusion
Knowing how to change a garage door motor the right way keeps your door running smoothly, safely, and quietly for years. Following these simple steps helps you avoid costly mistakes, extend your opener’s life, and maintain better home security without unnecessary stress or confusion.
If your motor is worn out or you’re upgrading for improved performance, proper installation and testing make a huge difference. And with routine care, like lubrication and safety checks, you’ll keep your entire garage door system in excellent shape for the long haul.
Need expert help? JT’s Overhead Doors offers trusted garage door repair in Mesa, AZ, ensuring reliable service when you need it most. Call us today for professional installation, maintenance, or emergency repairs, and enjoy a safer, smoother garage door experience without any hassle.
End Note
Looking for trusted garage door experts? Visit JT’s Overhead Doors to explore our professional services. We handle everything from garage door service and garage door repair to full garage door maintenance. Check our complete list of services and see why homeowners trust us for safe, smooth, and reliable garage door performance every day.
We also offer expert broken spring replacement, durable doors, and quality Safeway options. Upgrade with advanced openers or premium LiftMaster models for long-lasting performance. Discover our service areas, read helpful tips on our blog, and browse completed projects in our gallery for inspiration.
Stay connected with us on Instagram and Facebook for updates, deals, and maintenance tips. Don’t miss exclusive savings with our coupons. Learn more About Us and easily book your appointment through our Contact page. JT’s Overhead Doors is here to keep your garage door working perfectly year-round.
JT’s Overhead Doors
2449 E Lindrick Dr, Gilbert, AZ 85298, United States
+14806623315


