
A malfunctioning garage door motor can interrupt your daily routine and compromise home security, leading to added stress and unexpected inconvenience. Learning how to change a garage door motor safely helps your system work smoothly while preventing costly issues. This guide captures your attention with clear and simple steps that protect your family while keeping your garage secure and reliable.
Replacing a worn or faulty motor is more than just fixing a problem. It improves safety and ensures long-term reliability. In this guide, you will find step-by-step instructions covering preparation, removal, installation, and final testing, along with practical tips that make the process safer. Follow along and complete this project confidently today.
Safety First: Know the Risks and Regulations
Before you start working on a garage door motor, remember that it involves electrical parts and high-tension springs that can cause serious injuries. Taking the right safety steps keeps you and your garage door system protected.
1. Disconnect power before starting
Turn off the breaker and unplug the opener to avoid electric shocks. This step prevents sudden garage door movement while working safely.
2. Wear safety gear
Use safety glasses and gloves to protect your eyes and hands from dust, falling debris, and sharp edges during garage door motor replacement tasks.
3. Do not touch torsion springs
Torsion springs store a high amount of tension and can lead to severe injuries if handled improperly. Always leave spring adjustments or replacements to trained professionals for maximum safety.
4. Check safety settings
Test the force settings and photo-eye sensors to meet safety regulations. Correctly making adjustments helps prevent accidents and ensures your garage door system operates safely and stays dependable.
Working safely with a garage door motor means respecting its electrical and mechanical risks. By following these tips, you protect yourself and keep your garage door working smoothly for years.
Gather the Right Tools & Materials for Changing the Garage Door Motor
Proper tools make the job easier and safer. Having everything ready before you start will help you avoid delays and unnecessary trips. Here’s what you will need:
- Ladder with a stable base
- Flathead screwdriver, Phillips screwdriver, and an impact driver
- Adjustable wrench and level
- Wire strippers and electrical tape
- Safety glasses and gloves for protection
- A helper for lifting heavy parts safely
Also, prepare your replacement parts:
- New garage door motor unit
- Mounting brackets and fasteners
- Replacement safety sensors
- Remotes and keypads (if upgrading your system)
Having a second person nearby makes lifting the old unit down and securing the new motor much easier.
Choose the Right Type of Replacement Garage Door Motor
Choosing the right replacement garage door motor makes a big difference in performance, noise level, and overall durability. The correct motor also improves safety and long-term reliability.
Chain drive motors
Chain drive motors are affordable and durable. They are louder but reliable for detached garages or cost-friendly garage door motor installations.
Belt drive motors
Belt drive motors operate quietly with smooth movement, ideal for attached garages. They reduce noise and provide reliable, long-lasting garage door opener performance.
Screw drive motors
Screw drive motors have fewer moving parts, need minimal maintenance, and deliver steady lifting power. They work well in moderate climates with reliability.
Direct drive motors
Direct drive motors are the quietest choice with minimal vibration. Ideal for homes requiring a quiet and seamless garage door opener operation every day.
Consider horsepower requirements
A ½ HP motor suits lightweight single doors. For heavy wooden or double doors, choose ¾ HP or higher for better performance.
Look for smart features
Wi-Fi-enabled smart garage door openers with battery backup and mobile app control offer added security, convenience, and simple door management anytime.
Choosing the right garage door motor improves performance, reduces noise, and adds modern features. Matching the motor type to your needs ensures smooth and long-lasting operation.
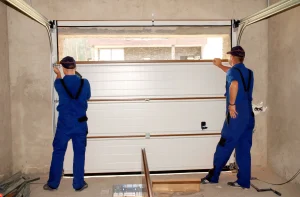
Prepare Work: Remove the Old Garage Door Motor Unit
Before removing your old garage door motor unit, make sure the power is disconnected. Careful handling prevents damage, injuries, and problems with the garage door track.
1. Unplug the Motor and Turn Off the Breaker
Disconnecting all power prevents shocks and stops sudden door movement. This is the most important safety step before removal.
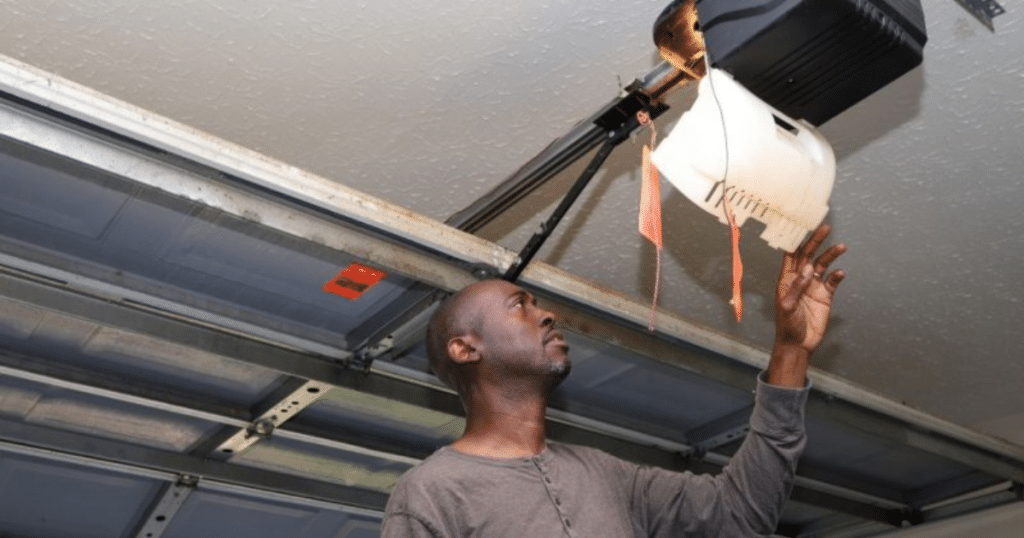
2. Remove Ceiling Brackets With Helper Support
Ask a helper to support the motor securely while you remove the mounting brackets. This avoids dropping the opener and protects the garage door rail.
3. Disconnect and Label Sensor Wiring
Carefully detach sensor wires and label each one. This makes reconnecting easier during your new garage door motor installation.
4. Release the Chain or Belt Tension Slowly
Loosen tension gradually to avoid sudden movement. Releasing tension slowly helps protect the drive chain, belt, and other important opener components from damage.
5. Detach the Drive Chain or Belt From the Rail
Unhook the chain or belt from the rail carefully. This frees the motor without straining the garage door track.
Carefully lowering the old opener helps protect the garage door rail from potential damage. Careful removal ensures a smoother garage door motor replacement process.
Install the New Garage Door Motor Unit
Once the old unit is removed, it is time to install the new garage door motor. Follow each step carefully for smooth and safe operation.
Step 1. Assemble the Rail and Check Trolley
Assemble the rail system following the manual and ensure the trolley moves smoothly for proper and reliable garage door motor operation.
Step 2. Secure Header Bracket Above Door Jamb
Install the header bracket directly above the door jamb and keep it level to maintain garage door opener stability and correct alignment.
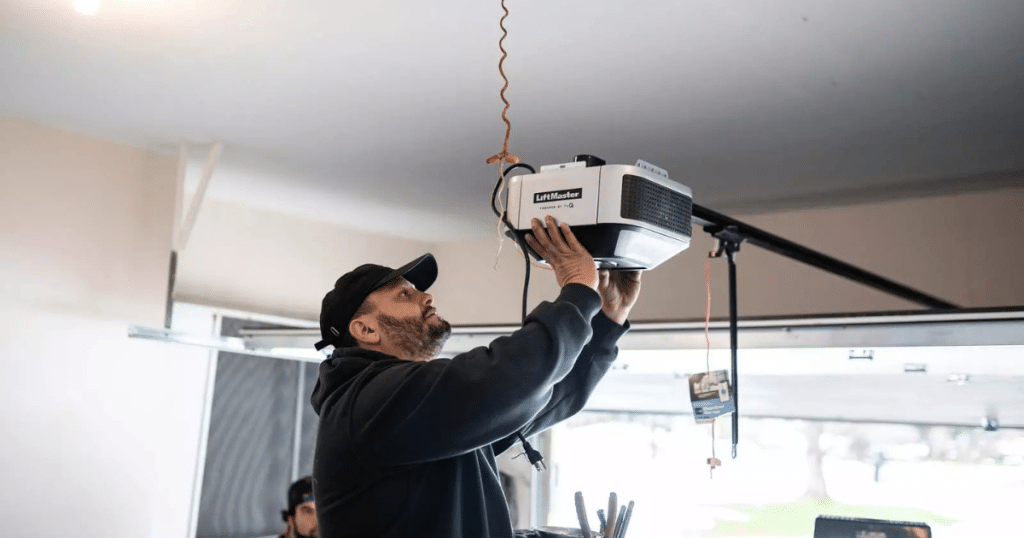
Step 3. Mount Motor Unit With Helper Support
Have someone assist while lifting and securing the motor onto the ceiling bracket to prevent accidents and protect the opener from damage.
Step 4. Attach the Lifting Arm to the Trolley and the Bracket
Firmly connect the lifting arm to the trolley and the door bracket to ensure smooth door movement without straining the garage door opener.
Step 5. Tighten Fasteners and Keep Motor Level
Inspect every bolt and fastener to make sure they are securely tightened. A properly leveled motor improves operation and extends your garage door opener’s lifespan.
Installing the new motor correctly is a key step in learning how to change a garage door motor safely. Proper setup ensures long-lasting and reliable performance.
Reinstall Sensors, Controls, Keypads & Remotes
Proper alignment of sensors and correct wiring are essential for the motor to function safely.
1. Mount Safety Sensors Above the Floor
Install sensors on both sides of the door about six inches high to ensure the garage door safety reversal system works properly.
2. Route and Secure Wiring Neatly
Run wires along walls or ceilings and fasten securely. Proper garage door opener wiring prevents tangling, damage, and future operational problems.
3. Reinstall and Program the Wall Console and Keypad
Mount the wall console and wireless keypad securely. Carefully follow the setup instructions to program both devices, ensuring smooth and reliable control of your garage door opener.
4. Pair Remotes and Mobile Apps
Press the motor’s “learn” button, then activate the remote or app within thirty seconds to sync for easy wireless garage door access.
Proper sensor alignment and programming keep your garage door opener safe and convenient, ensuring reliable operation and preventing accidental door-related issues.
Testing, Adjustment & Safety Checks to Change Garage Door Motor
Testing is an essential step to confirm your new garage door motor operates smoothly without unnecessary strain. It also ensures all safety features work properly, keeping your system reliable.
1. Restore Power and Test Controls
Reconnect power, then test the wall control, remote, and keypad to ensure the garage door motor responds correctly and smoothly.
2. Perform Force Setting Test
Gently hold the door while closing. It should reverse with slight resistance, confirming that the garage door opener safety settings function properly.
3. Check Sensor Reversal With the Object
Place an object under the door. Sensors must detect it and reverse immediately, proving the safety reversal system works correctly.
4. Adjust Travel Limits and Force
Fine-tune travel limits and force settings until the garage door opens and closes smoothly without hesitation or straining the motor.
If the door hesitates or does not reverse when it should, fine‑tune the settings as described in the motor’s manual.
Maintenance Tips & Troubleshooting for Changing Garage Door Motor
Regular maintenance keeps your garage door motor running smoothly and prevents unexpected failures. Simple care helps extend its lifespan and ensures reliable garage door opener performance every day.
1. Lubricate Chain or Screw Drive Twice Yearly
Lubricate chain or screw drives twice yearly to reduce friction. Belt and direct drive motors need less frequent lubrication.
2. Tighten Bolts and Fasteners Yearly
Check and tighten all bolts and fasteners yearly. This prevents vibration loosening that can damage your garage door opener over time.
3. Check Sensor Alignment After Bumps
Sensors can shift after accidental bumps. Regularly checking and adjusting alignment ensures your garage door opener’s safety reversal system works reliably.
4. Listen for Unusual Noises or Hesitation
Grinding, squeaking, or hesitation signals problems. Fixing unusual noises early prevents bigger issues and keeps your garage door motor running smoothly.
5. Inspect the Door Balance and Springs if Issues Persist
Recurring issues may mean poor door balance or worn springs. Proper tension ensures smooth garage door opener performance and reduces strain on the motor.
Simple maintenance and quick troubleshooting keep your garage door motor in top condition. Taking time to care for it ensures safety, efficiency, and long-lasting performance.
FAQs
Is replacing just the opener a DIY-friendly job?
Replacing the opener can be DIY-friendly if you’re confident with basic tools and safe electrical connections. If unsure, hiring a professional ensures correct installation and avoids safety risks.
How long does a garage door motor last?
A typical garage door motor lasts around 10 to 15 years with proper care and regular maintenance. Usage frequency and climate can also affect its lifespan.
Why won’t the door reverse when hitting an obstacle?
If the door won’t reverse, the force settings or safety sensor alignment might be incorrect. Adjusting them restores the safety reversal system and prevents accidents.
How do I test the safety reversal function?
Place a solid object like a block of wood under the closing door. The garage door should reverse immediately upon touching the object.
Conclusion
Replacing a failing motor improves safety, reliability, and smooth performance. By learning how to change a garage door motor, you save on service costs while ensuring long-lasting operation. Proper tools and careful steps make the process easier and safer for any homeowner wanting dependable results.
Always follow the manufacturer’s instructions and use the right tools to avoid mistakes during installation. Prioritizing safety ensures smooth operation and prevents damage. If you feel unsure at any stage, hiring a professional is the best way to save time and protect your garage door system.
For trusted help beyond DIY projects, JT’s Overhead Doors provides expert service, including reliable garage door repair in Mesa, AZ. Our skilled team handles motor replacement, opener installation, and sensor alignment with precision. Call today for fast, professional garage door solutions you can trust.
End Note
At JT’s Overhead Doors, we deliver safe, precise, and reliable garage door solutions tailored to your needs. From garage door service to full garage door repair, our team ensures your system runs smoothly. Explore our services for trusted installation, maintenance, and opener upgrades you can count on.
We handle everything from garage door maintenance to advanced openers, including LiftMaster models with expert care. Check out our door collection, like Safeway, to upgrade your home’s curb appeal. Learn more about our team on the About Us page and browse our blog for helpful tips.
Serving multiple service areas, we proudly offer professional installations backed by years of trusted expertise. View our gallery, grab exclusive coupons, and follow us on Instagram or Facebook. Ready for expert help? Contact us today for a free consultation and experience hassle-free garage door solutions.
JT’s Overhead Doors
2449 E Lindrick Dr, Gilbert, AZ 85298, United States
+14806623315